Rhythm, Rhyme, and Repetition–in a Freebie!
 When I first started teaching, I was intimidated by the music part of my job for a number of reasons: a) I’m not a singer. b) My husband has been known to remind me to “find the beat Hon” when we’re dancing at a wedding (which is really the only place beyond a preschool classroom that you will find me dancing.) c) And when I was in school to get my teaching license, I actually thought to myself, “when do I take the class that teaches me how to do the songs and rhymes?” That class never came.
What I have learned over my years in the classroom since then is that kids don’t care what your voice sounds like, they don’t care if you can dance, and they actually prefer it if you are totally silly! Thank goodness for that!
Rhythm and rhymes, whether in the form of music or a simple poem, are an easy way to incorporate methods to reach all different learning styles. You’ve got the auditory and linguistic kids covered, obviously, you can use pictures or props for your visual kids, and your kinesthetic kids get lots of input with the movements.
Here are 10 quick tips for using rhythm and rhyme in the classroom:
- Kids don’t care if you can carry a tune. Have fun and sing often.
- Sing familiar melodies.
- You don’t need to play a musical instrument. Children love to hear your voice.
- Repetition is good. Repeat familiar songs and rhymes often
- Break into song anytime. Use music and rhymes while waiting in line.
- Shake your sillies out. Get up and move after sitting for long periods of time.
- Use music to change energy levels.
- Never force a child to sing or dance.
- Let loose. Be silly. Sing nonsense songs. Let children play with the sound of language.
- The best tip of all! Combine music with rhyme and literature.
With rhythm and rhyme, I think the simpler, the better for our little ones. There’s a reason nursery rhymes have been around forever, they’re memorable! With a little repetition, your preschoolers will have simple rhymes memorized in no time. So what’s the benefit, other than the cuteness of a preschooler reciting a poem or nursery rhyme? They are also a young child’s first experience with literacy as they begin to learn how language works. Plus, they’re just really fun to say.
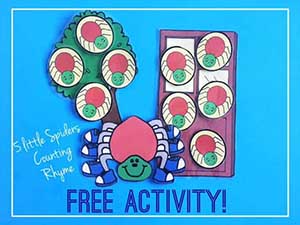
Sure, there are lots of nursery rhymes that have been around for generations. Some have been around for so long that we’ve forgotten what they really mean…Ring Around the Rosy anyone? But really any simple rhyme that includes repetition and rhythm can be a nursery rhyme. Read It Once Again includes a whole section in every unit dedicated to music and rhymes because we believe that the patterns and repetition that are found in songs and rhymes are the building blocks to phonemic awareness and learning to read. And we even have visuals made for you, so they’re super easy to incorporate into your lesson plans. Just take a look at this one that we’re giving away as a bonus freebie for October.
 Loading...
There are several ways that you can use this activity. You could print the visuals as is and use them on your story board. I would recommend putting the spiders on velcro so that you can easily remove them along with the rhyme. You might also want to print numerals 0-5 to use with the activity so that kids can begin to associate numerals with counting with one-to-one correspondence.
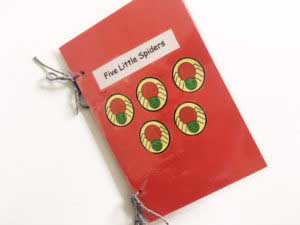
You could also print them and make a book that could be used in large or small group. Don’t forget that you can also change the print settings to 2 sheets per page to make the visuals smaller so that you could make a take-home book or small book for your library.

If you’d like to incorporate movement into this activity, you might consider teaching your students the signs that go along with some of the vocabulary in the book. Not only will it help children remember the words, but it’s also great for kids who may not have the expressive language skills to say the words yet. You can look up specific words in American Sign Language at signingsavy.com, handspeak.com, or babysignlanguage.com. The think I like about these particular sites is that they will give you and explanation of why the sign is what it is, which helps me remember them. There are also videos of someone showing you how to do it, which I also find helpful.
 Loading...
If you’d like to see a more detailed explanation of this activity and its uses, please visit our Facebook page for a video tutorial. And don’t forget to let us know what you think or how you might use this activity in your own classroom!


Trackbacks/Pingbacks